Chat transcript security with IP whitelisting
IP whitelisting is a security practice that involves creating a list of approved IP addresses or ranges that are allowed to access a particular network, system, application, or service. This approach helps enhance security by restricting access only to authorized entities to chat transcripts.
This feature is available on the app and cloud platform.
- Only Super admins(owners) can access this option.
- Currently, only IPV4 addresses are supported for whitelisting.
Chat transcripts are vital records of interactions between users and chatbots, whether they are conversation logs or chats with agents. By enabling IP whitelisting, the platform allows access to the conversations only from specified IP addresses.
Chat transcript visibility for different permissions:
Users with Bot Access: If the user already has access to the bot, they can seamlessly view the chat transcript links without the need to whitelist their IP address. However, users must have an active session (logged into the platform) to access the chat transcript links. If not logged in, they will be prompted to log in before viewing the links.
Users without Bot Access: Users who do not have access to the bot can access the chat transcript links only by whitelisting their IP address.

Users without bot access and without whitelisted IP addresses: The chat transcript link will not be accessable.

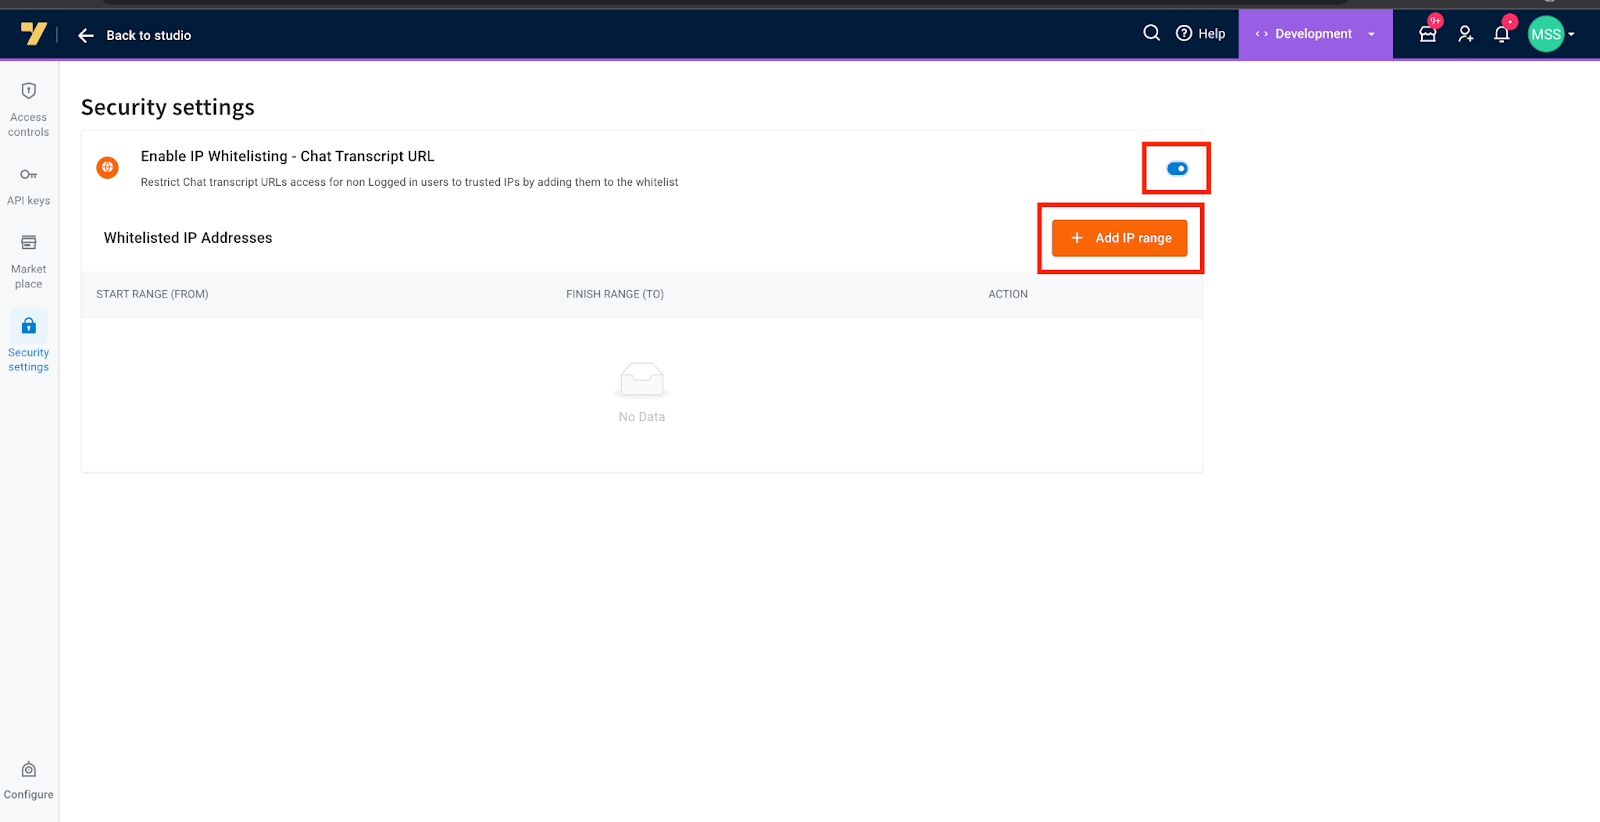
Enable IP whitelisting on app
You can enable IP whitelisting from the security settings on the app platform. Follow these steps:
- Navigate to the Configuration tab.
- Click on the Security tab located at the top of the page.

- Enable the IP Whitelisting by clicking the toggle button.
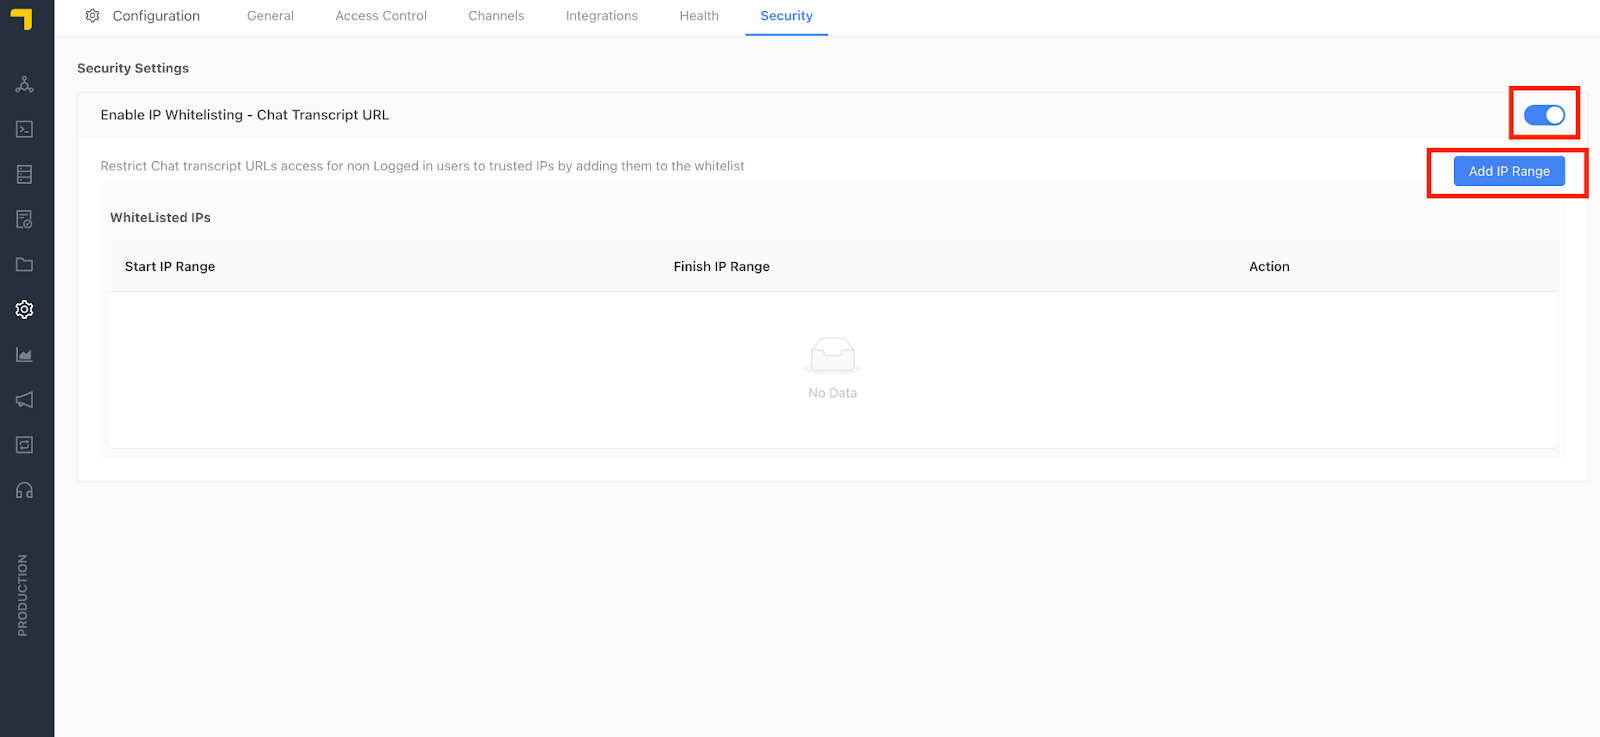
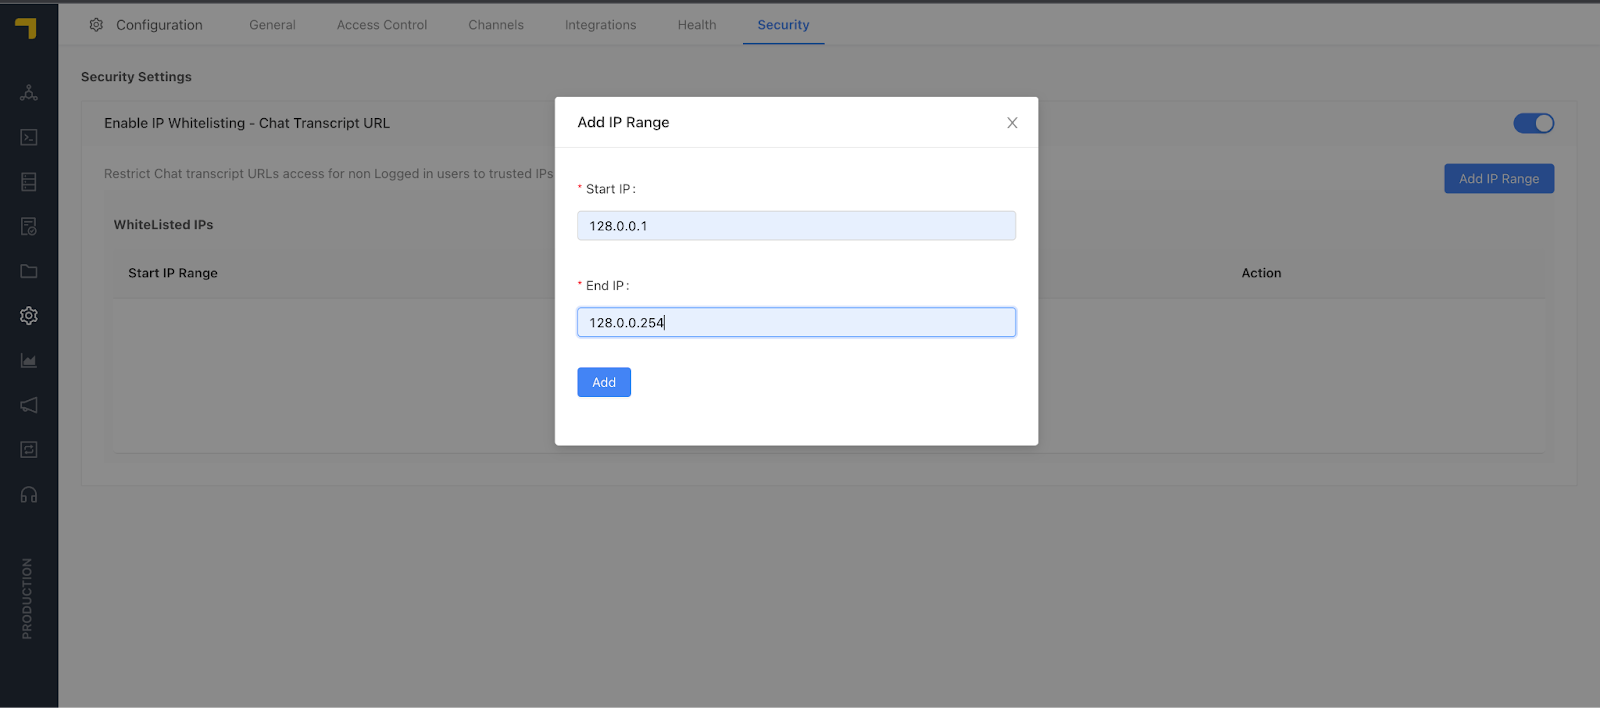
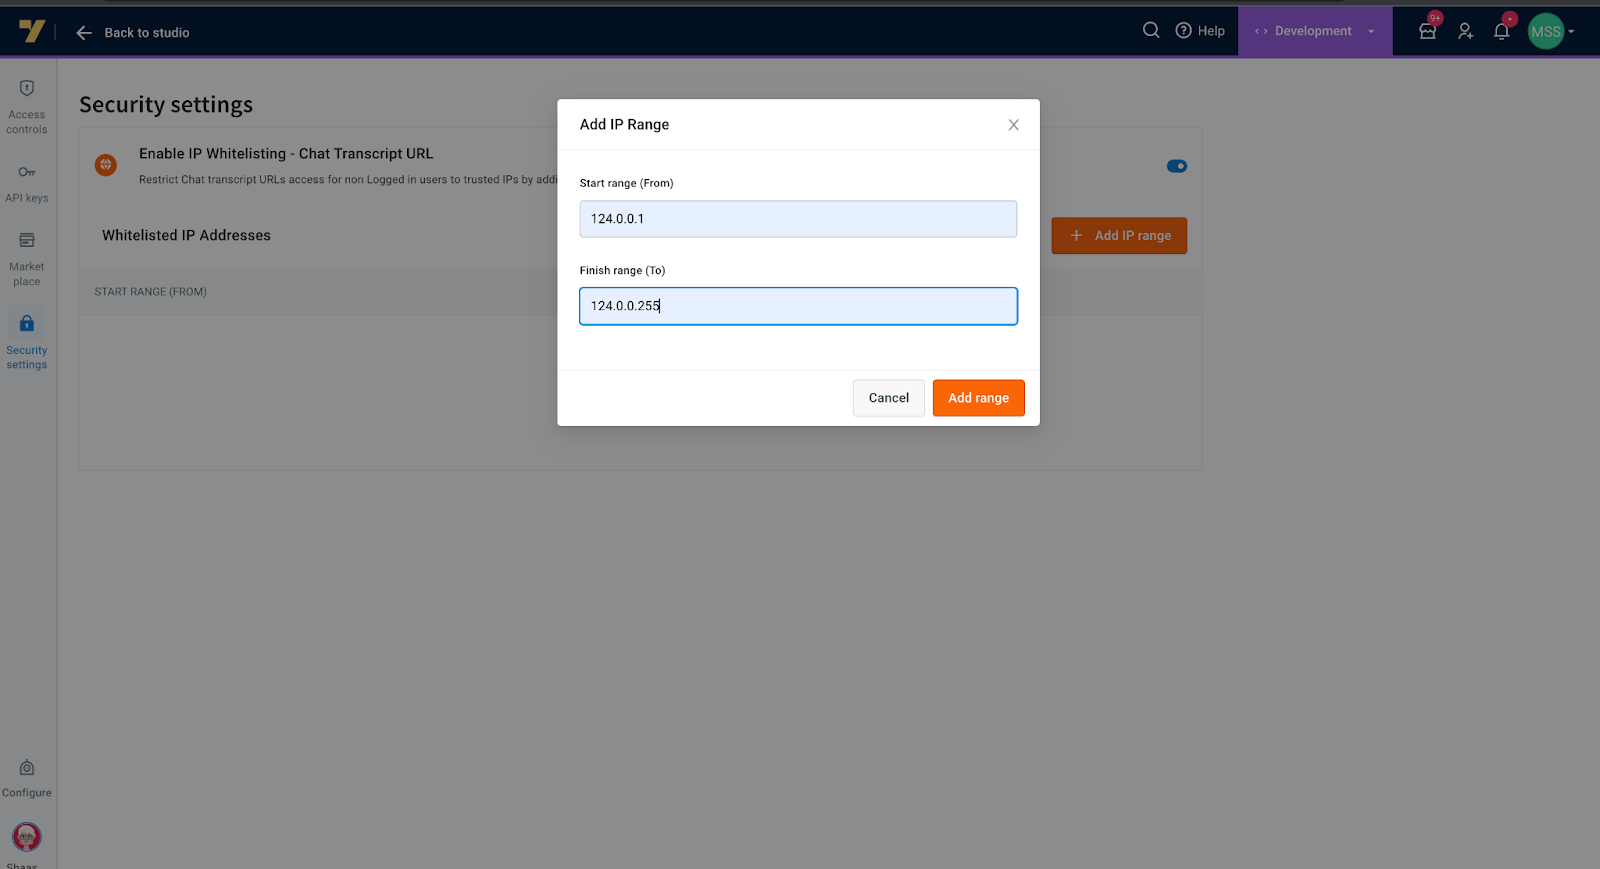
- To add IP addresses, click Add IP Range.
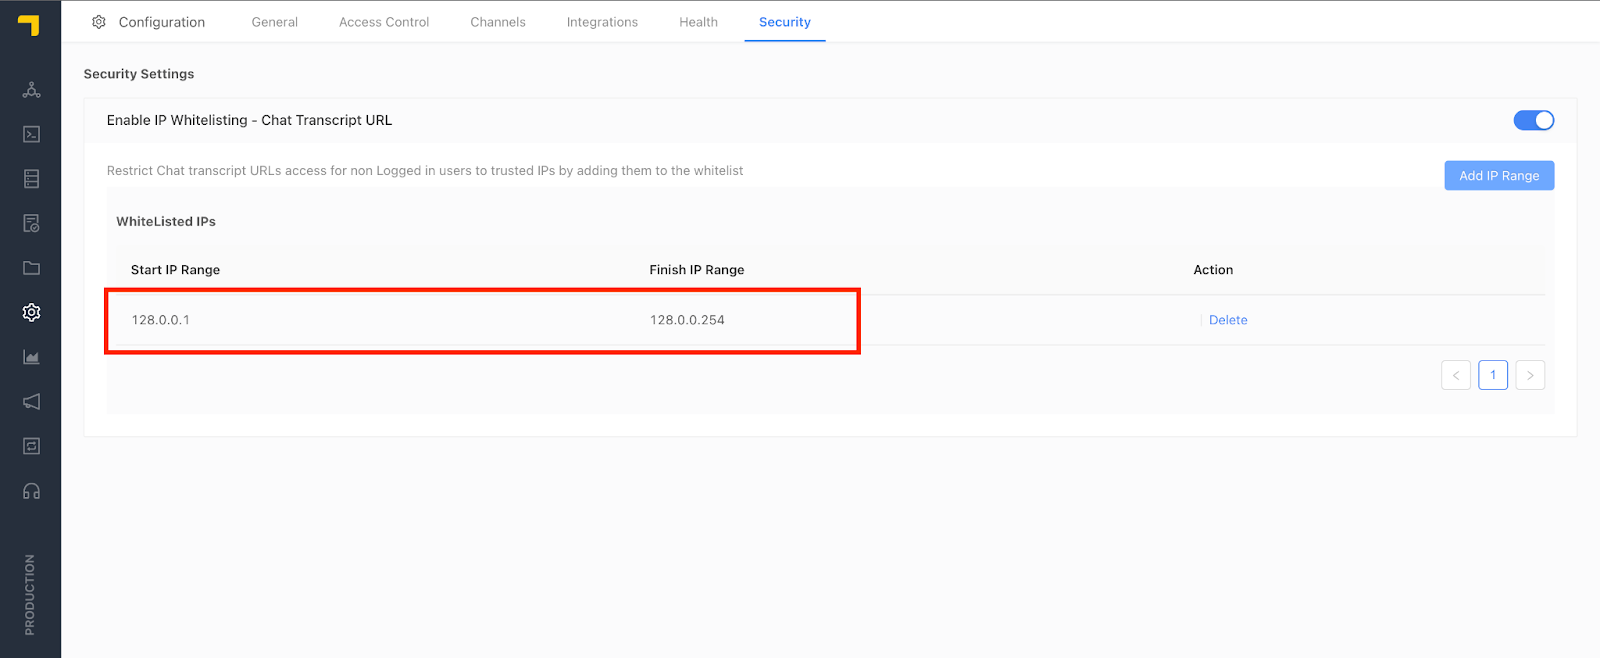
After adding the IP range, it will be displayed on the dashboard.
If you wish to whitelist only one IP address, add the same IP address in both the Start IP Range and End IP Range fields.
Enable IP whitelisting on cloud
To enable IP whitelisting on the cloud platform, follow these steps:
- Log in to the platform. Click the Access control icon at the top of the page.
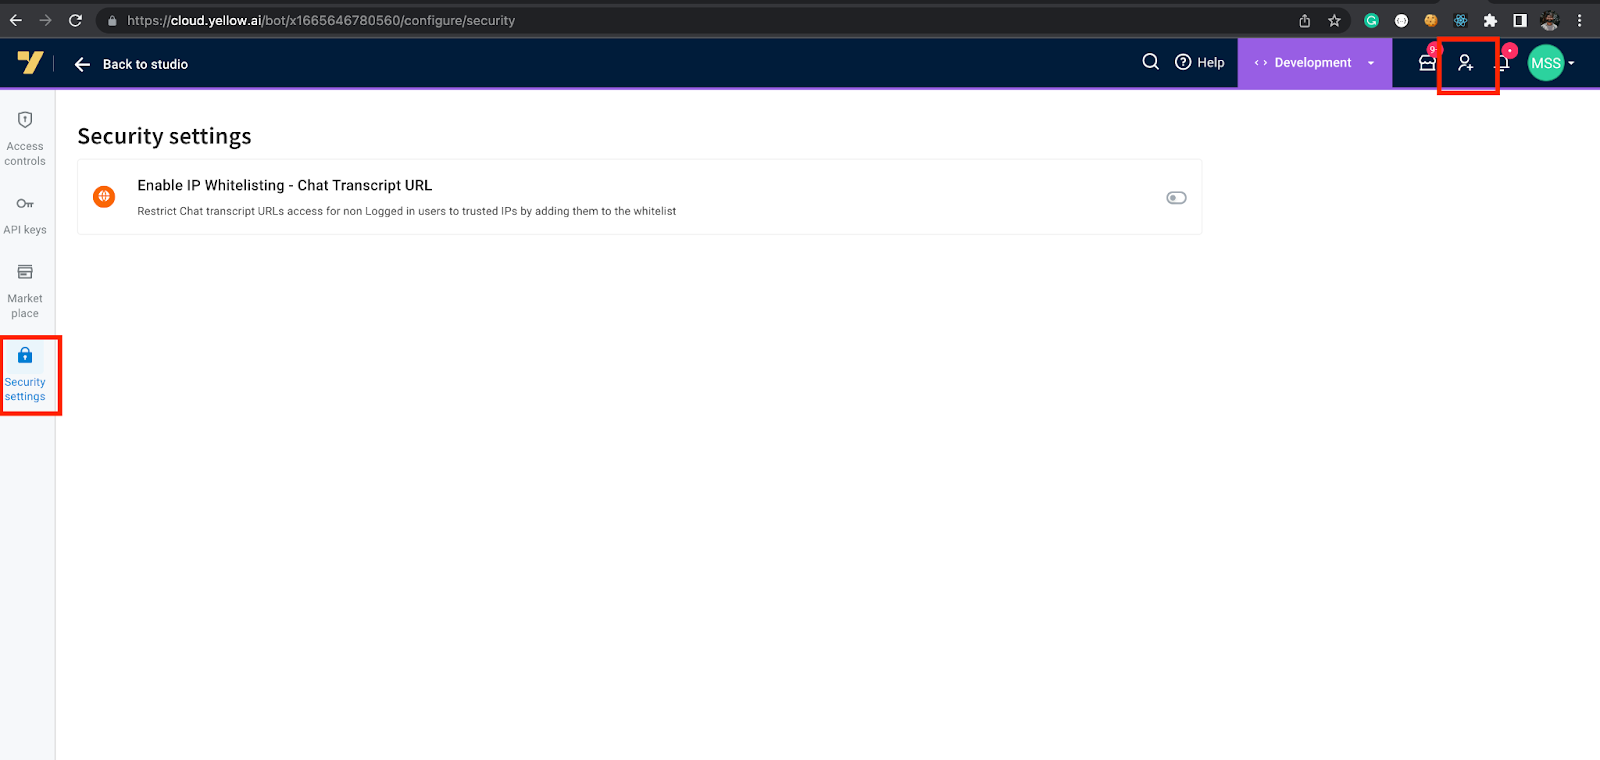
- Click on the toggle button, which will reveal an option to add IP addresses.
- Click on the Add IP Range button to include the IP address range.
After adding the IP range, it will be displayed on the dashboard. You can edit/delete these details.

If you wish to whitelist only one IP address, add the same IP address in both the Start IP Range and End IP Range fields.